> For the complete documentation index, see [llms.txt](https://docs.norrnext.com/authorize.net-for-phoca-cart/llms.txt). Markdown versions of documentation pages are available by appending `.md` to page URLs; this page is available as [Markdown](https://docs.norrnext.com/authorize.net-for-phoca-cart/phoca-cart-configuration.md).
# Phoca Cart Configuration
Learn how to configure Phoca Cart to accept payments with Authorize.net.
### General Options
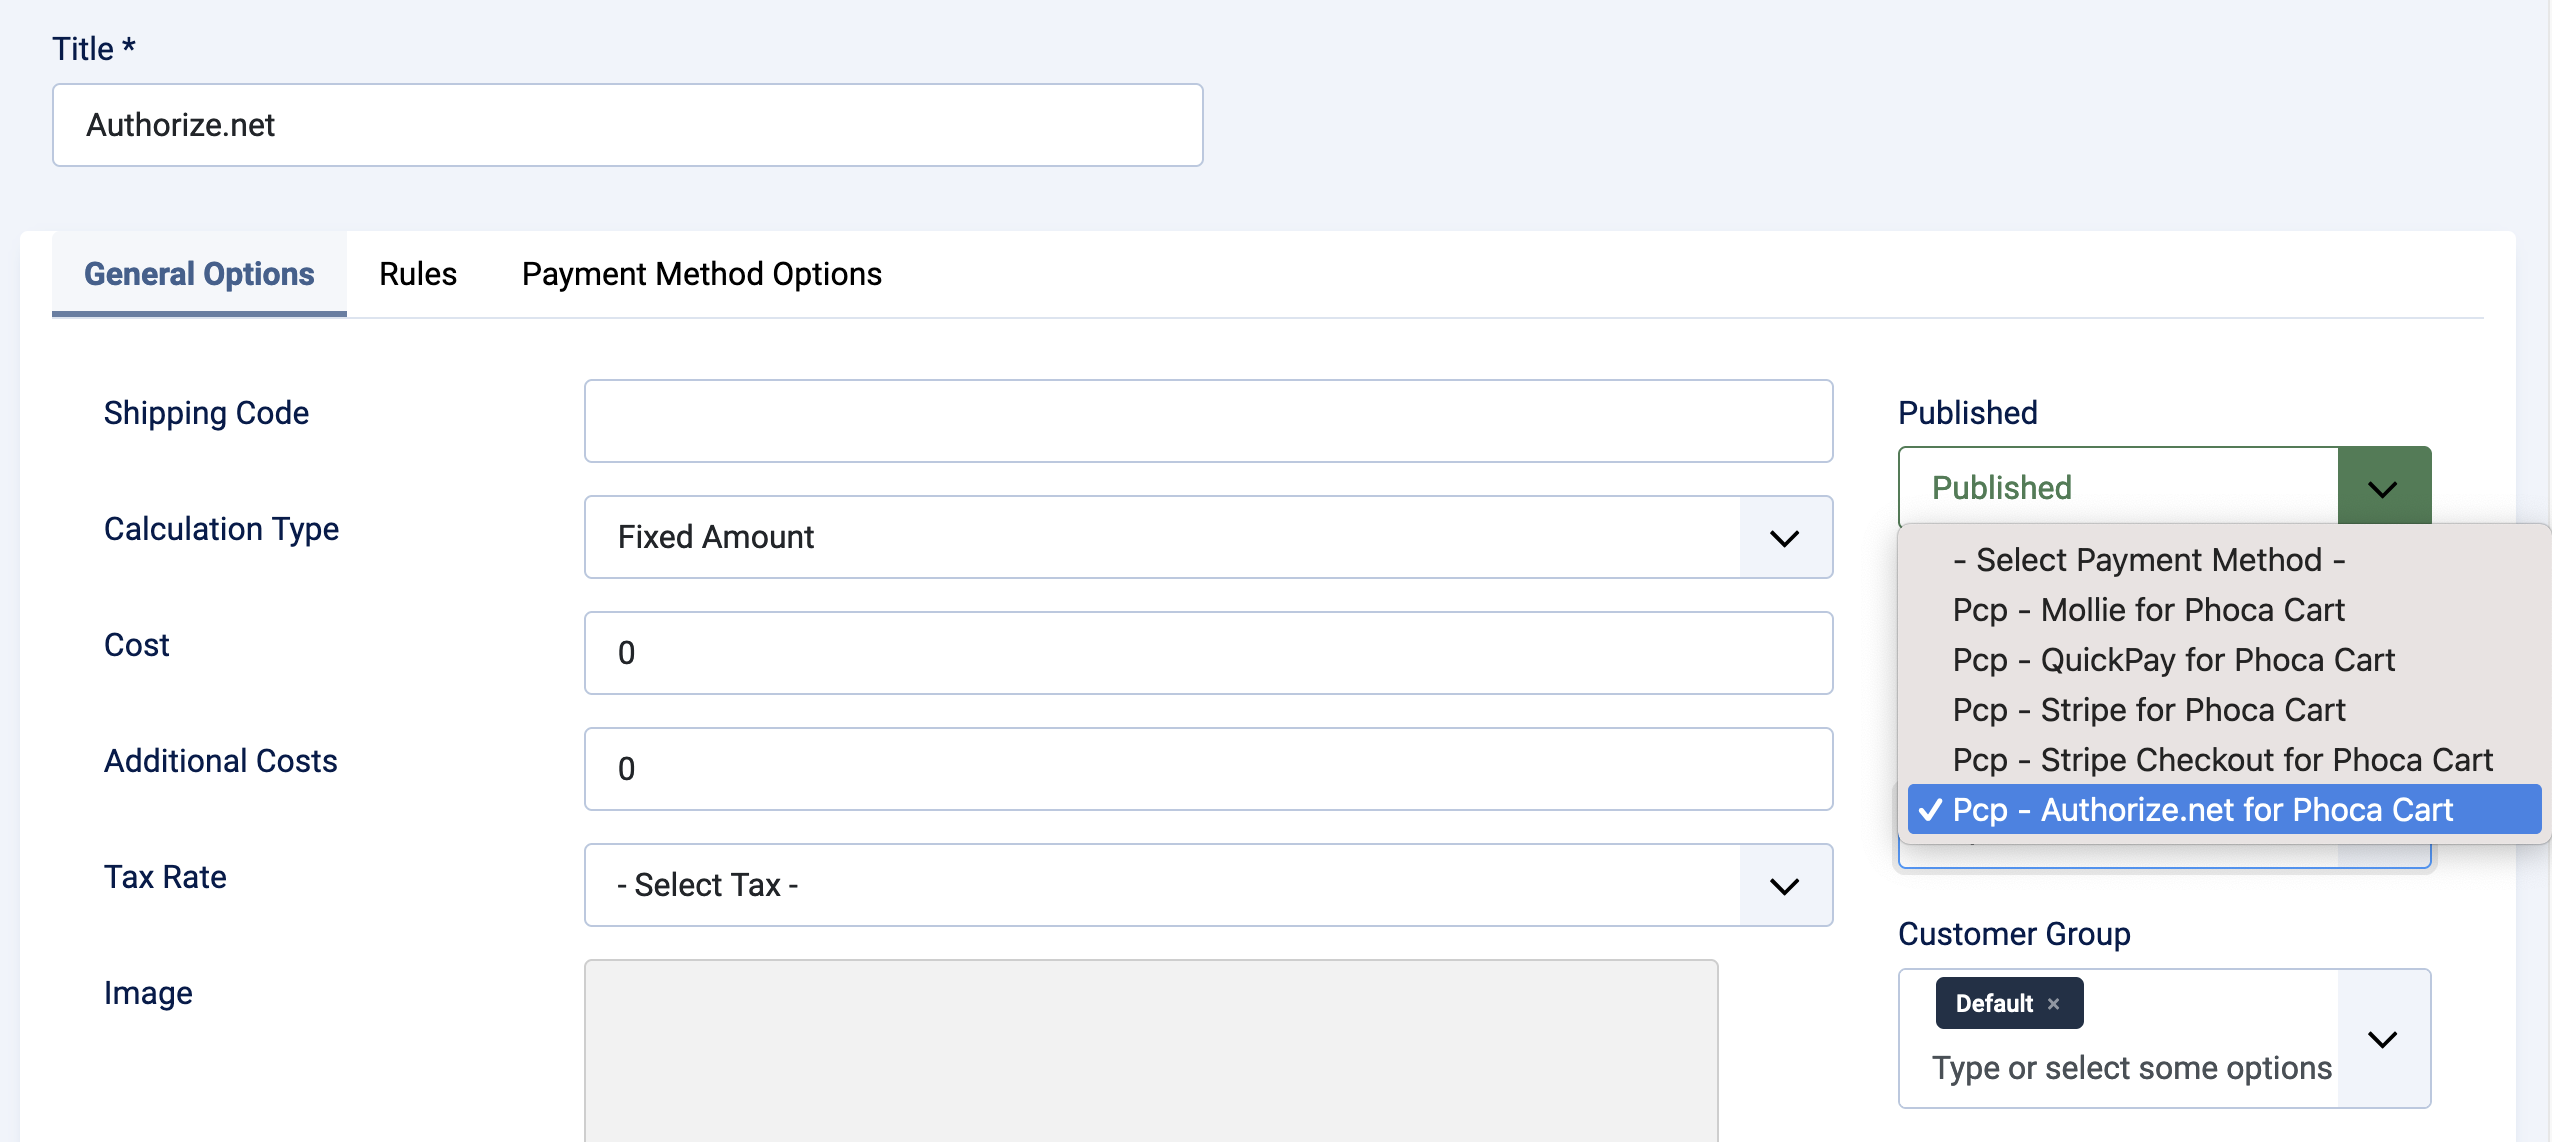
In this tab select Authorize.net as `Payment Method`.
Authorize.Net payment method in Phoca Cart - General Options
### Payment Method Options
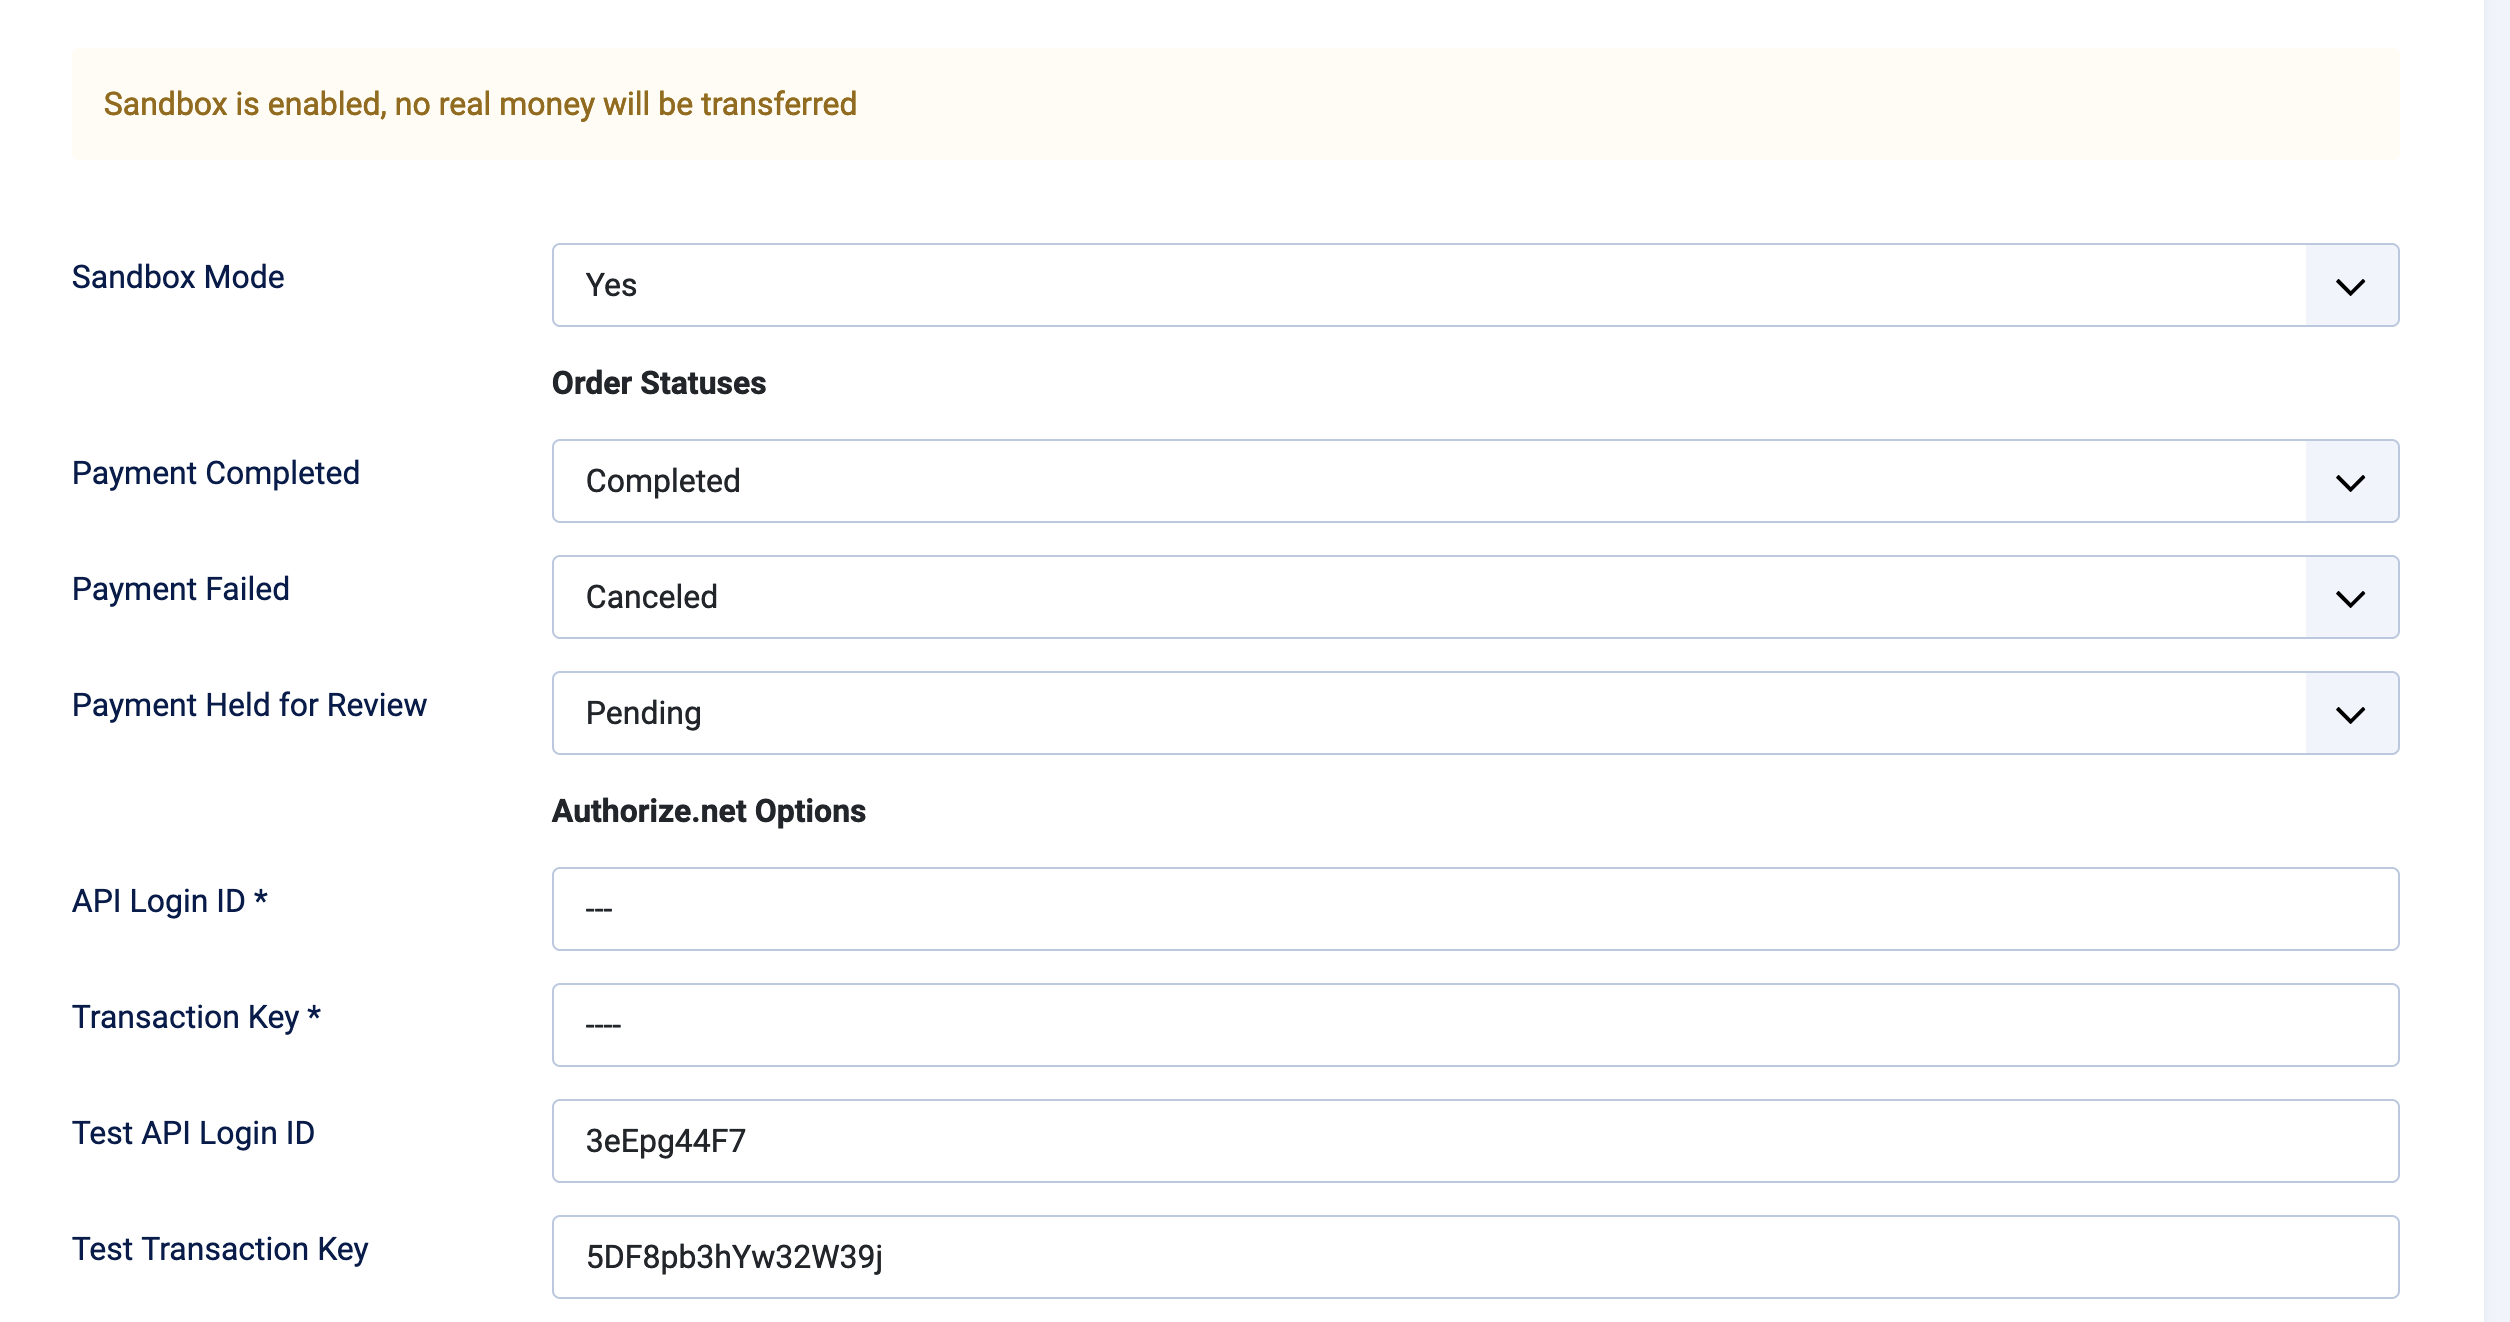
Authorize.Net Payment Method Options
* **Sandbox Mode** — If Sandbox Mode is enabled, no real money are transfered. Sandbox is used to test the payments.
#### **Order Statuses**
* **Payment Completed** — Select the order status that will be applied based on successfull payment transaction result. By default it is *Completed*
* **Payment Failed** — Select the order status that will be applied based on failed payment or error during transaction processing. By default it is *Cancelled*.
* **Payment Held for Review** — Select the order status that will be applied when payment payment is held for review.
#### **Authorize.net Options**
* **API Login ID** — Set your live API Login ID. You can find it under Settings in your **Authorize.Net** Merchant Interface.
* **Transaction Key** — Set your live Transaction Key. You can find it under Settings in your **Authorize.Net** Merchant Interface.
{% hint style="warning" %}
API keys are required fields to save the configuration. Fill them if even you are going to use sandbox mode.
{% endhint %}
* **Test API Login ID** — Set your sandbox API Login ID. You can find it under Settings in your **Authorize.Net** Merchant Interface.
* **Test Transaction Key** — Set your sandbox Transaction Key. You can find it under Settings in your **Authorize.Net** Merchant Interface.
* **Transaction Type** — Use 'Authorize and Capture' to authorize and automatically capture the transaction. By default it is set to *Authorize and Capture.*
* **Send Email** — Send customer's email address to Authorize.net.
* **Send Cart** — Send cart of products to Authorize.net.
* **Send Billing Address** — Send customer's billing address to Authorize.net.
* **Send Shipping Address** — Send customer's shipping address to Authorize.net.
*
```