> For the complete documentation index, see [llms.txt](https://docs.norrnext.com/stripe-for-virtuemart/llms.txt). Markdown versions of documentation pages are available by appending `.md` to page URLs; this page is available as [Markdown](https://docs.norrnext.com/stripe-for-virtuemart/virtuemart-configuration.md).
# VirtueMart Configuration
### Create new order status
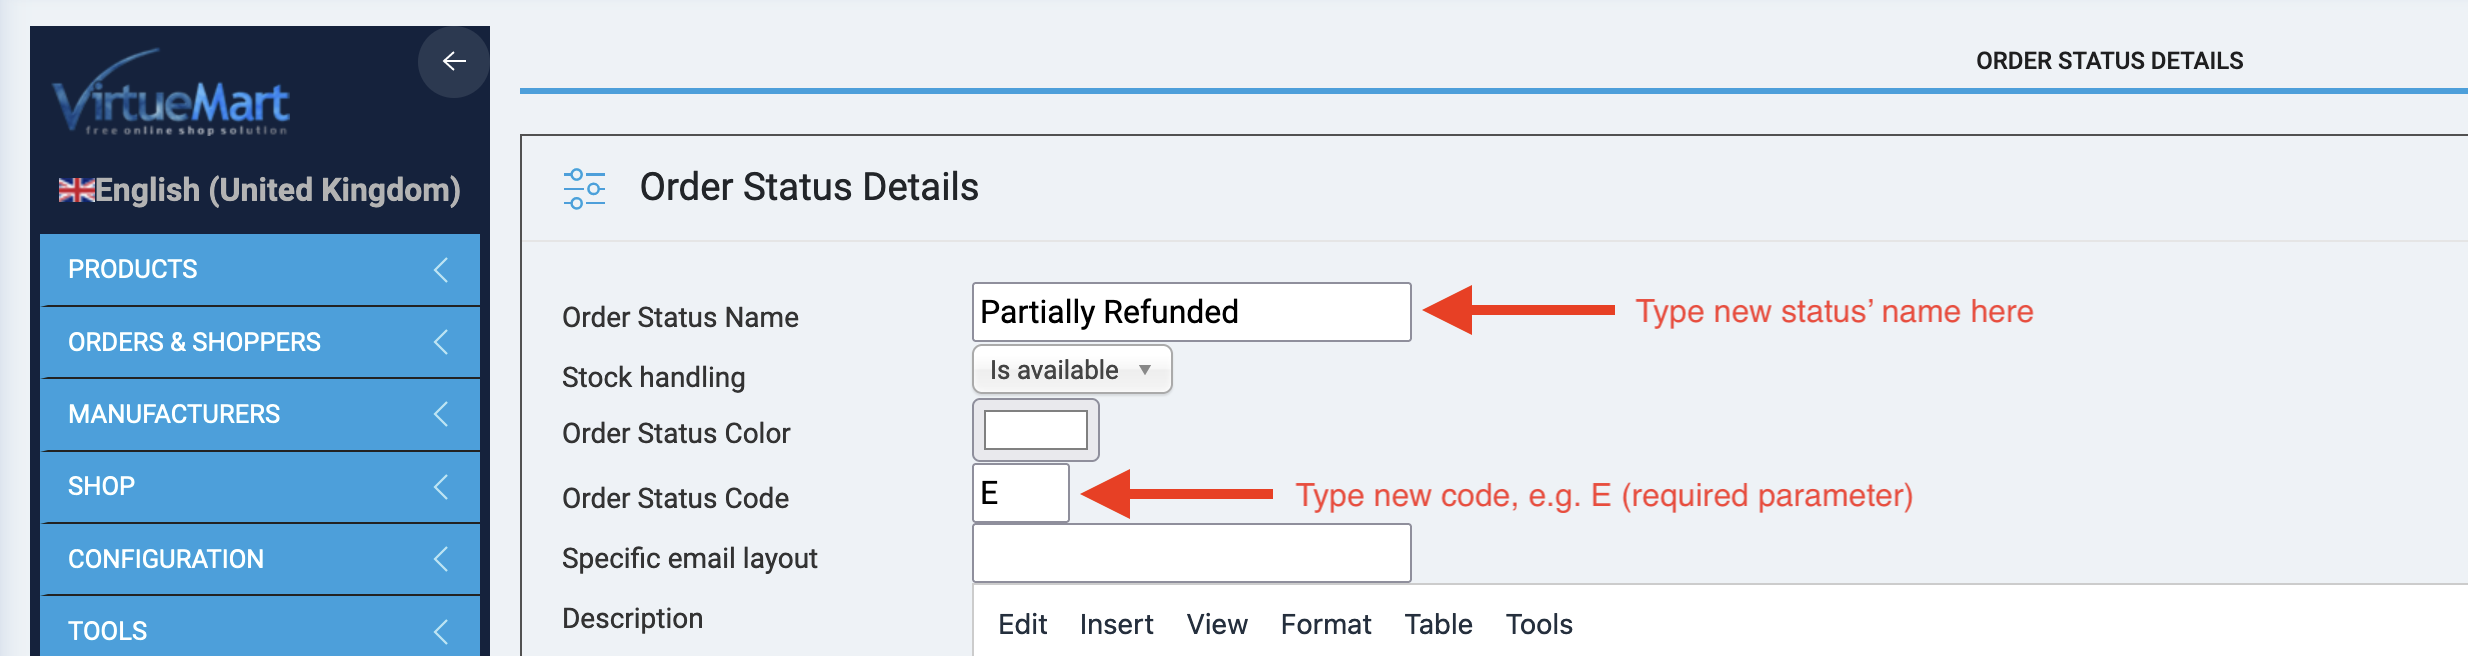
Stripe allows to release partially refund while VirtueMart doesn't have such order status by default. We need to create new status.
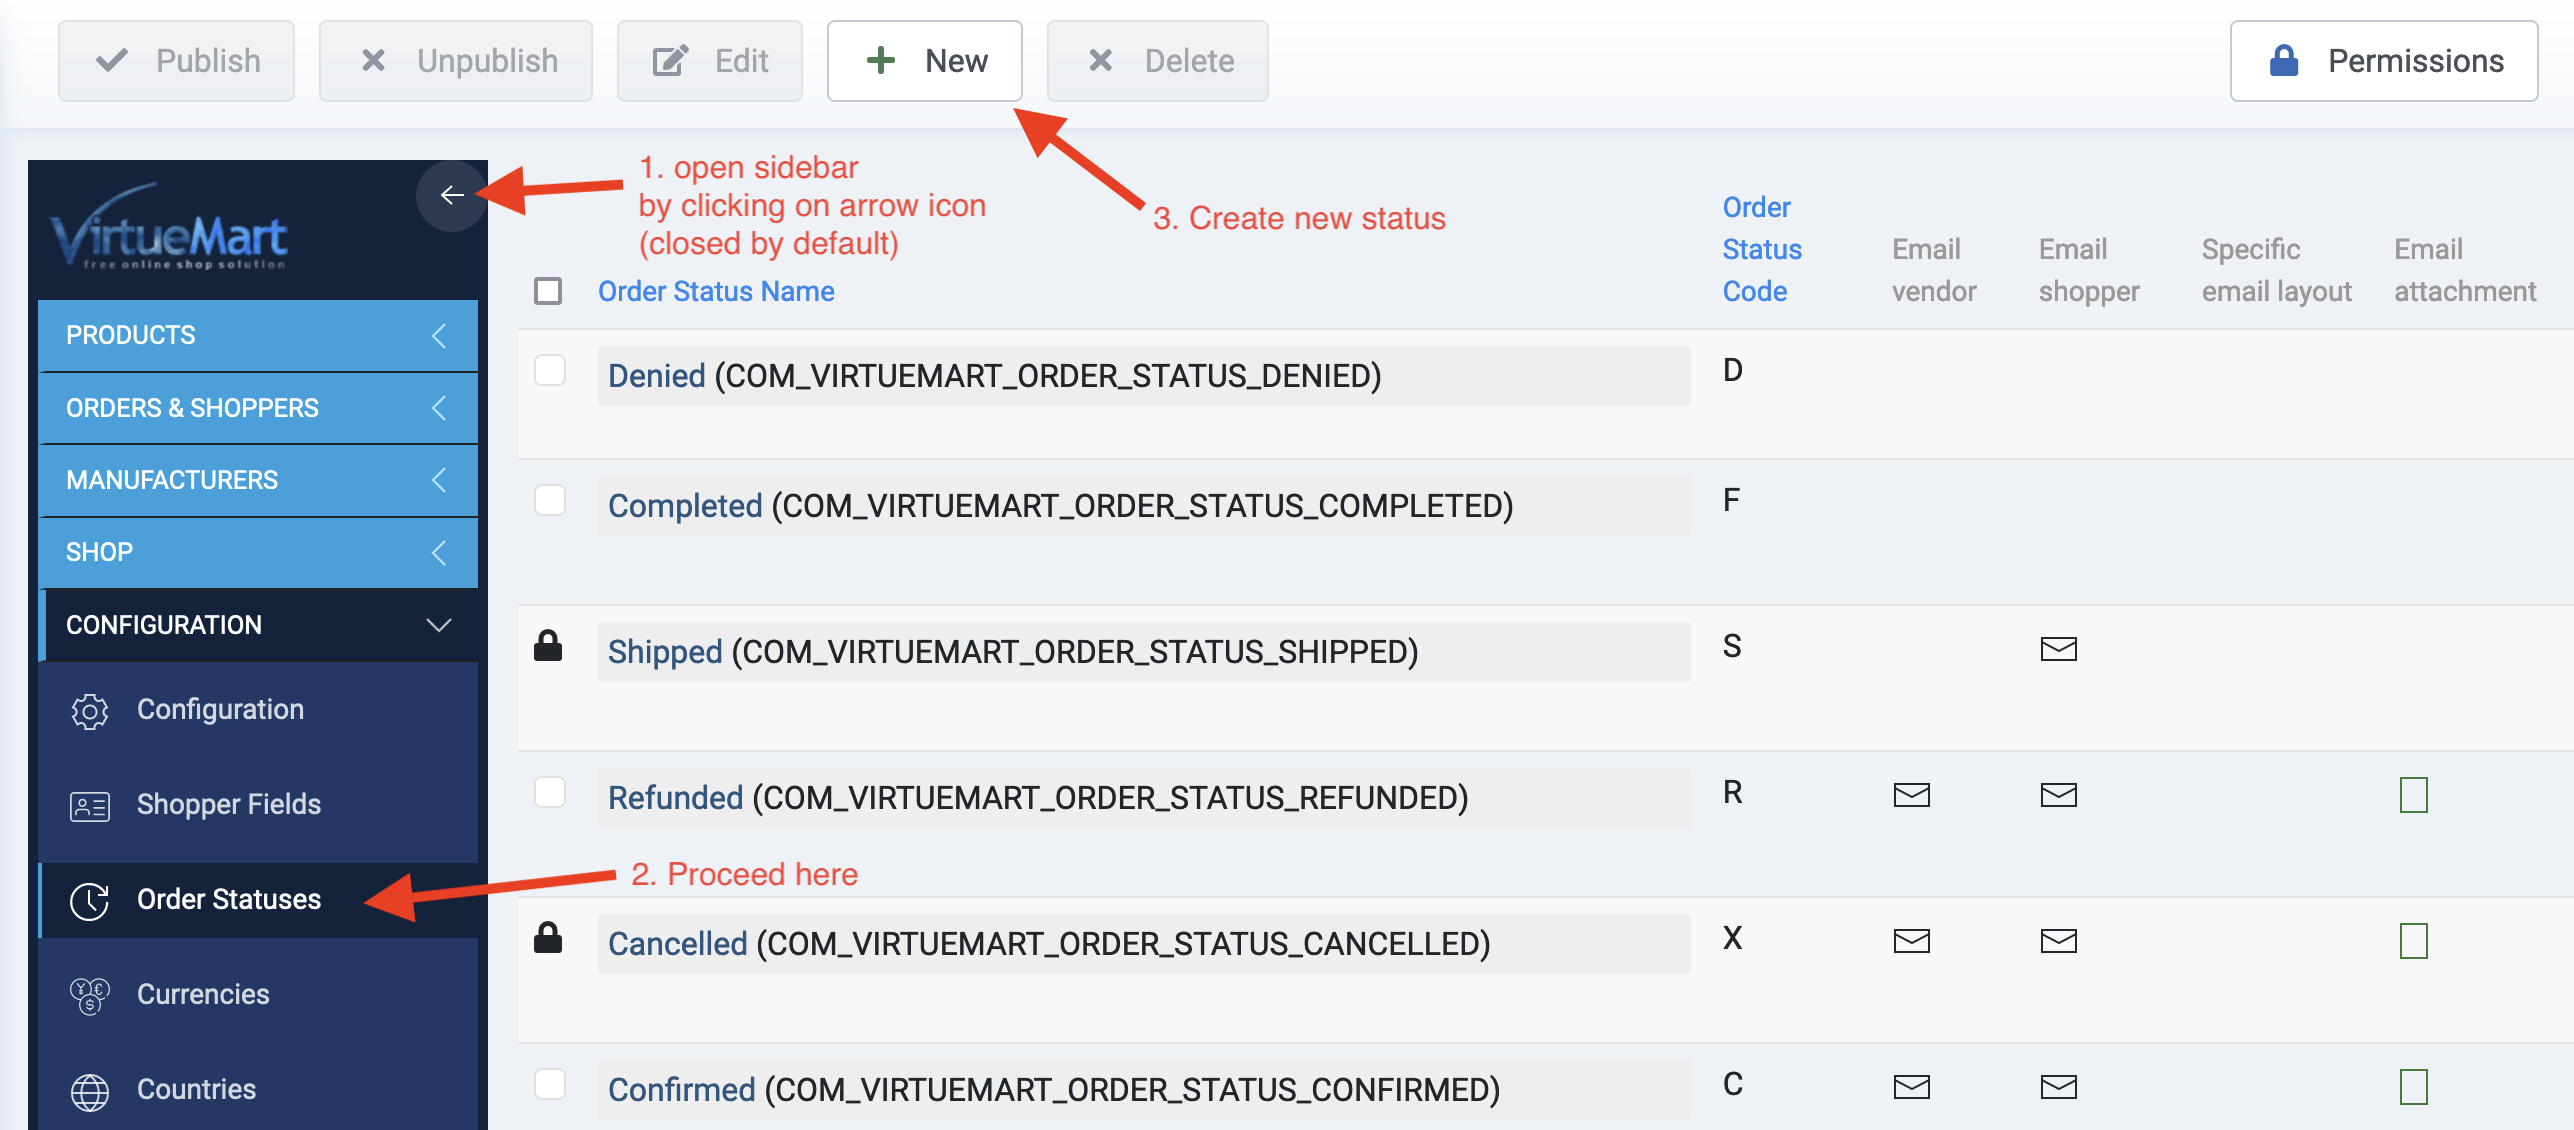
Go to VirtueMart > any page and click on arrow icon to open sidebar for additional links (sidebar is closed by default).
Open sidebar to get extra menu
Open extra menu with menu items by clicking on Arrow icon (sidebar is closed by default) and go to Configuration > Order Statuses.
Proceed to Order Statuses and create a new status
Type `Partially Refunded` name and do not forget to add **Order Status Code**. It might be any non-taken letter (e.g. E).
{% hint style="info" %}
If you use Stripe Checkout, then you also need to add `Payment Unpaid` status too.
{% endhint %}
### Payment Method Information
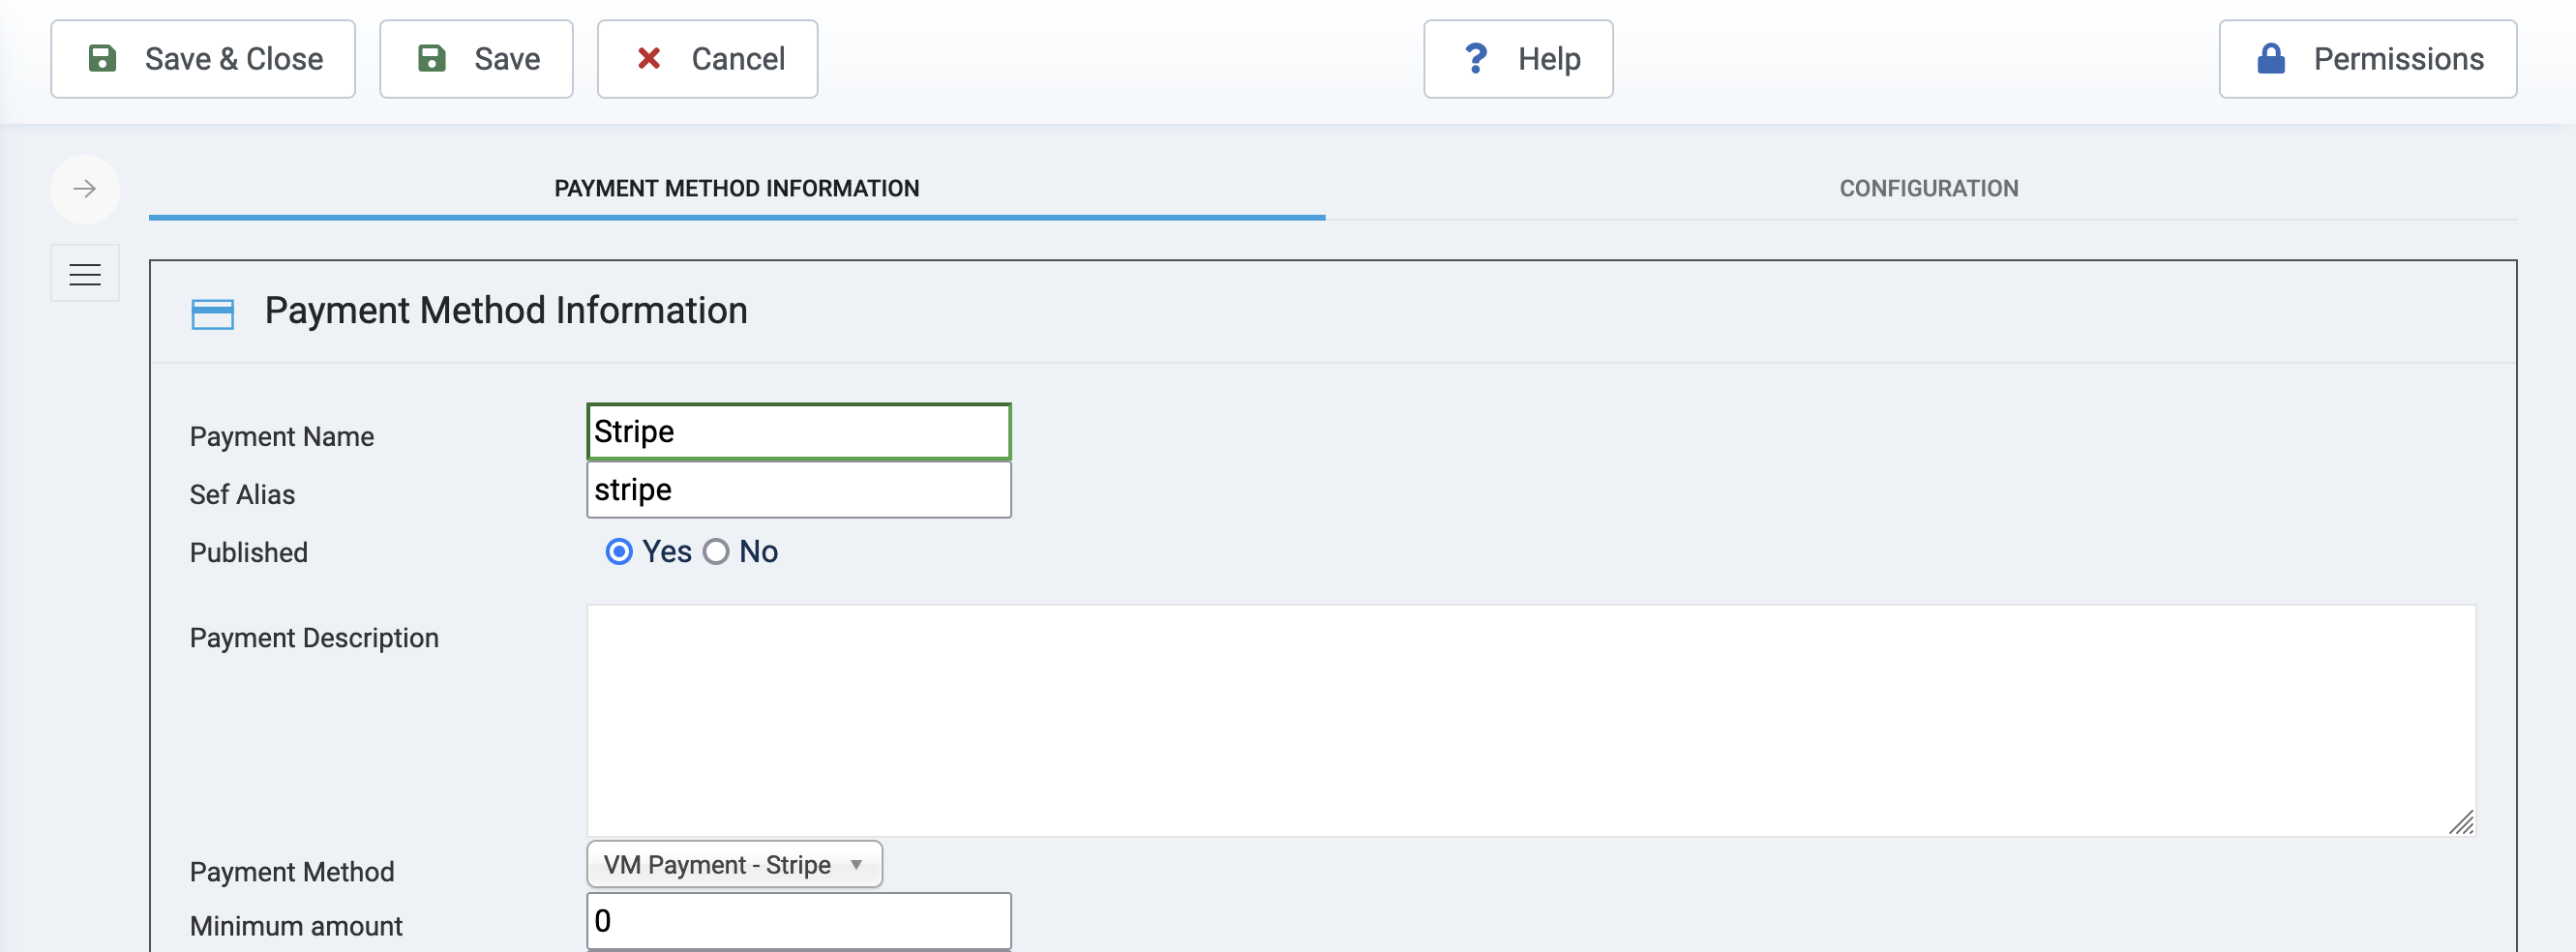
Go to `Payment Methods` and edit your **Stripe** method and open **Payment Method Information** tab:
VirtueMart - Payment Method Information
Type name of Stripe payment method which will be displayed at the front-end (e.g. "Stripe" or "Pay via Debit/Credit cards").
### Configuration
VirtueMart - Stripe payment method configuration
* **Sandbox Mode** - If Sandbox Mode is enabled, no real money are transferred. Sandbox is used to test the payments.
* **Debug** - if enabled, all transactions will be logged.
* **Payment Intent Description** - allows to set custom payment intent description. Use {ORDER\_NR} constant to pass the order number.
#### **Order Statuses**
* **Payment Completed** - Select the order status that will be applied based on successfull payment transaction result. By default it is *Completed*
* **Payment Failed** - Select the order status that will be applied based on failed payment or error during transaction processing. By default it is *Cancelled*.
* **Payment Cancelled** - Select the order status that will be applied based on cancelled payment or error during transaction processing. By default it is *Cancelled*.
* **Payment Unpaid** - Select the order status that will be applied based on unpaid payment or error during transaction processing. By default it is *Confirmed*. *This parameter appears in Stripe Checkout plugin only*.
* **Payment Refunded** - Select the order status that will be applied based on refunded payment or error during transaction processing. By default it is *Refunded*.
* **Payment Partially Refunded** - Select the order status that will be applied based on partially refunded payment or error during transaction processing. By default it is *Refunded*. Please select *Partially Refunded.*
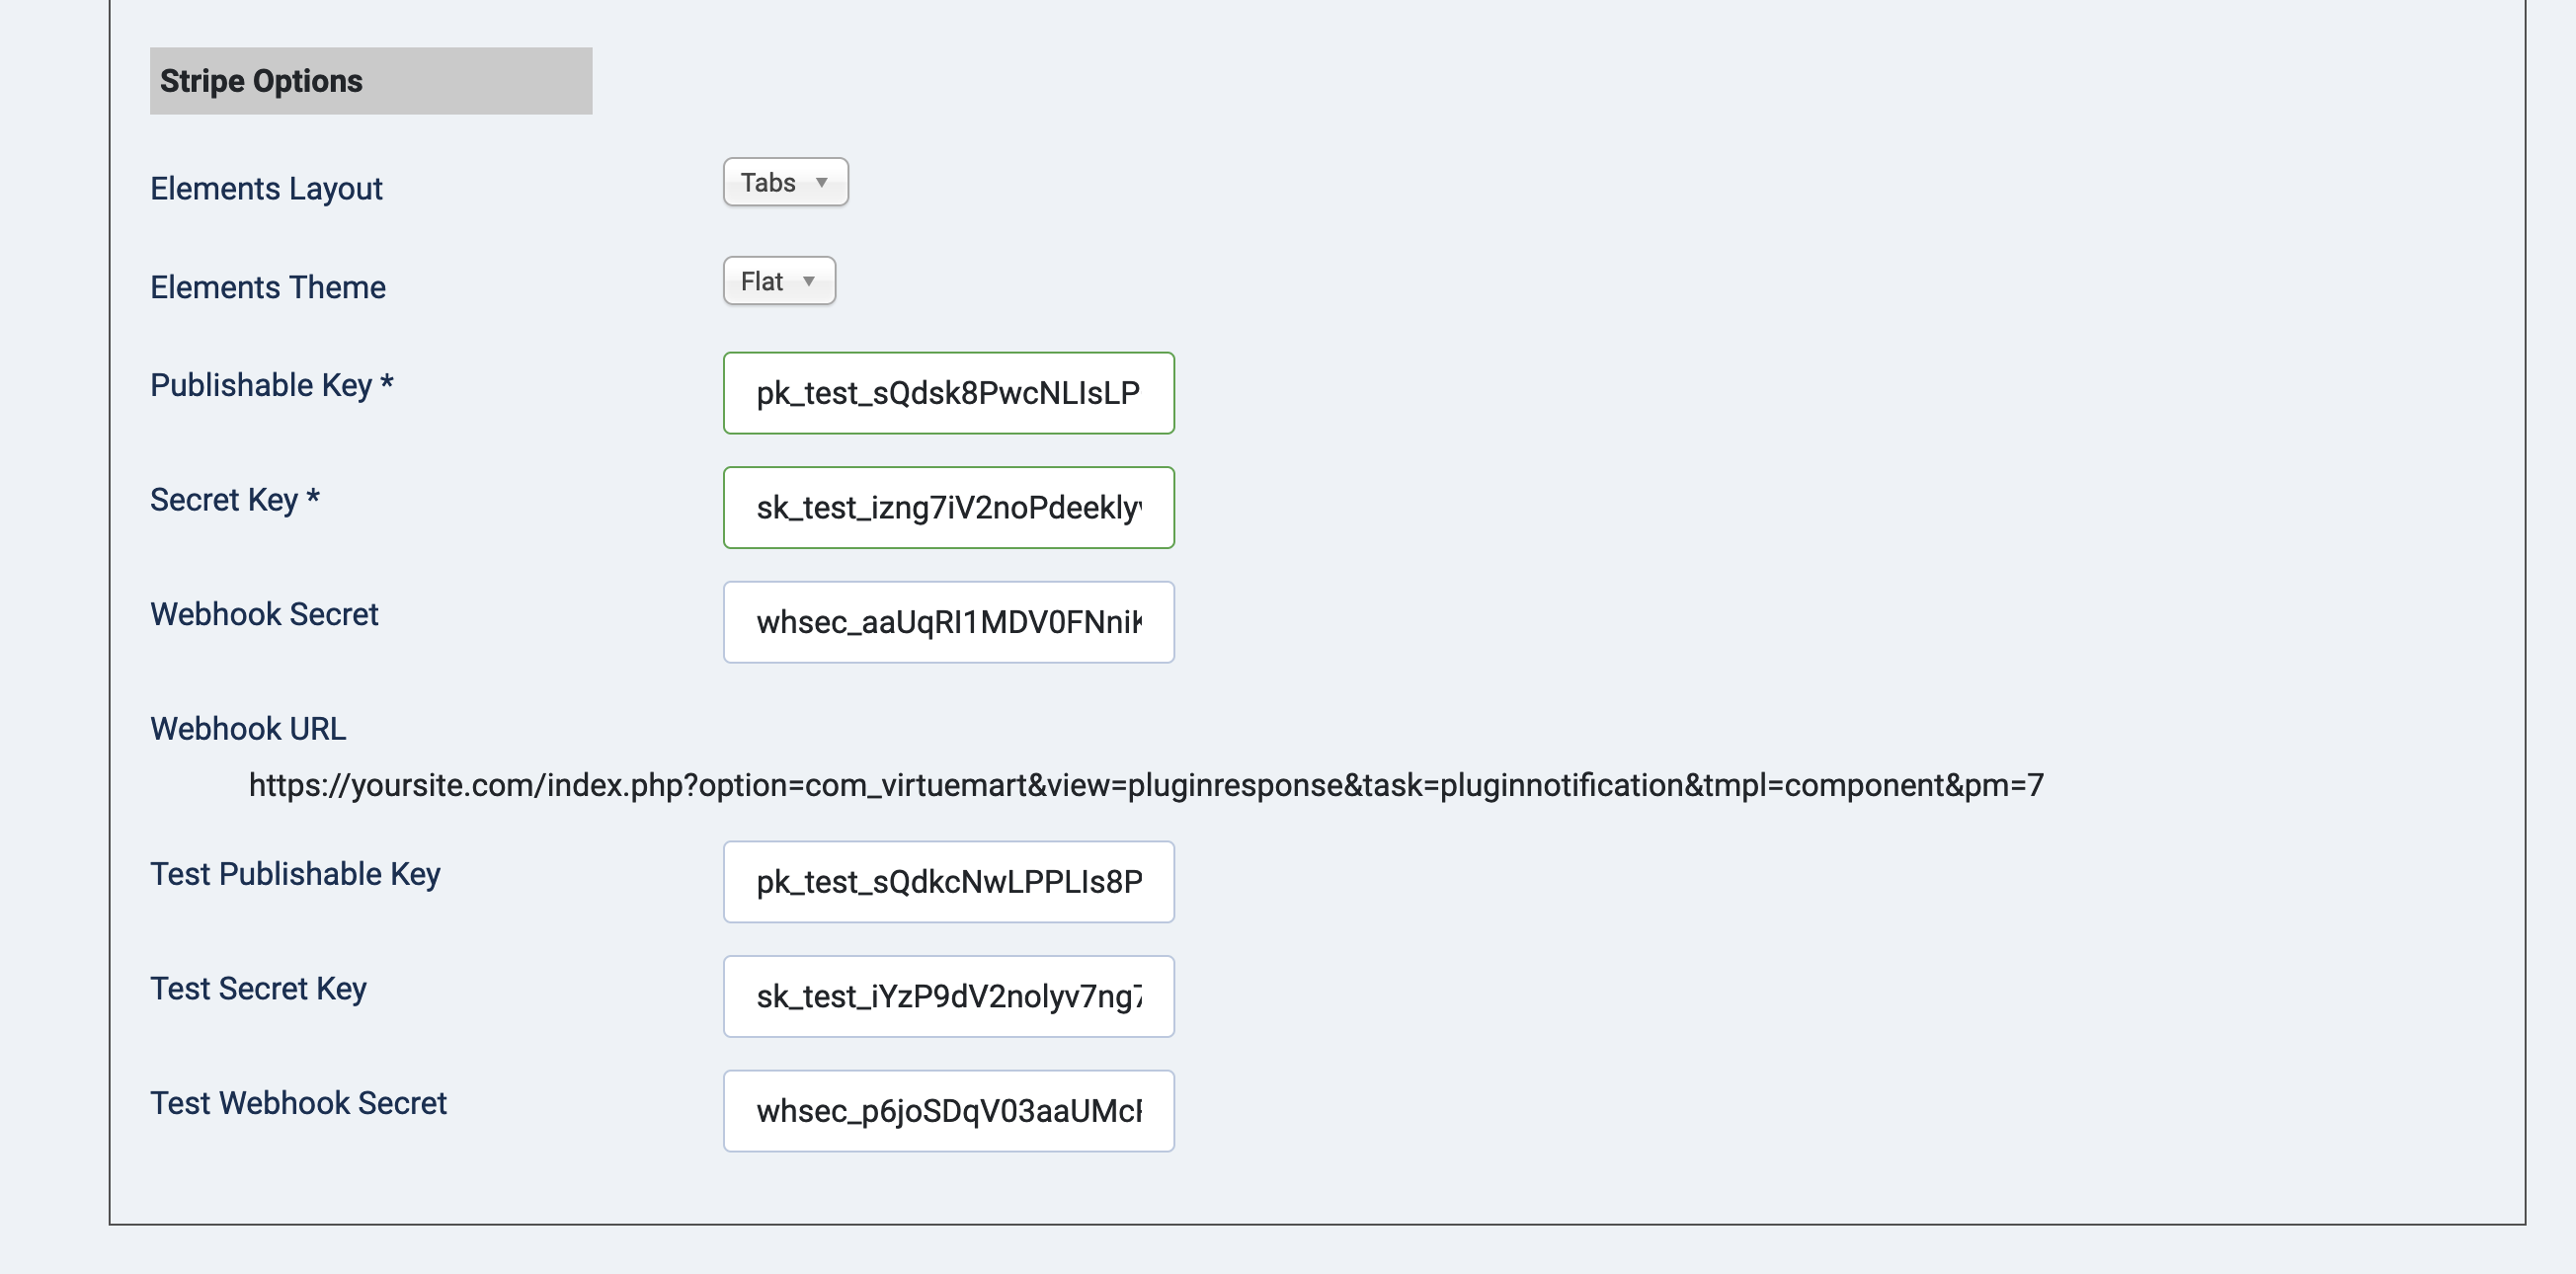
#### **API Keys**
API Keys and Webhook settings
* **Elements Layout** - `Tabs` / `Accordion`. *This parameter is available in Stripe plugin only (not in Stripe Checkout).*
* **Elements Theme** - `Stripe` / `Flat` / `Night`. *This parameter is available in Stripe plugin only (not in Stripe Checkout).*
* **Publishable Key** - Set your Publishable Key. You can find it in **Stripe Dashboard > Developers > API keys**.
* **Secret Key** - Set your Secret Key. You can find it in **Stripe Dashboard > Developers > API keys**.
* **Webhook Secret** - Set your Webhook Signing Secret. You can find it in **Stripe Dashboard > Developers > Webhooks**.
* **Webhook URL** - a URL to paste in Stripe dashboard.
Example of Stripe plugin:
`https://yoursite.com/index.php?option=com_virtuemart&view=pluginresponse&task=pluginnotification&tmpl=component&pm=7`
Where is *mysite.com* - set up your domain and correct `pm=` parameter taken from your site and make sure you have a valid SSL certificate. You need to copy this URL and paste it in Stripe dashboard > [Webhooks](https://docs.norrnext.com/stripe-for-virtuemart/stripe-configuration/webhooks).
{% hint style="info" %}
API keys are required fields to save the configuration. Fill them if even you are going to use sandbox mode.
{% endhint %}
**API Test Keys**
* **Test Publishable Key** - Set your test Publishable Key. You can find it in Stripe Dashboard.
* **Test Secret Key** - Set your test Secret Key. You can find it in Stripe Dashboard.
* **Test Webhook Secret** - Set your Webhook Signing Secret. You can find it in Stripe Dashboard > Developers > [Webhooks](https://dashboard.stripe.com/account/webhooks).